디자인 패턴이란?
과거의 소프트웨어 개발 과정에서 발견된 설계의 노하우를 축적하여 이름을 붙여, 이후에 재이용하기 좋은 형태로 특정의 규약을 묶어서 정리한 것이다.
캠프에서 배우며 이미 알고, 활용하고 있는 디자인 패턴들
- 싱글톤 : 특정한 기능을 하는 오브젝트가 한 개만 존재해야 하게 하는 패턴
- 오브젝트 풀 : 오브젝트의 재활용을 통해 효율적으로 오브젝트를 생성하고 회수하는 패턴
- 컴포넌트 패턴 : 독립적인 기능을 하는 다양한 기능들을 다양한 오브젝트에 붙이고 뗄 수 있도록 구성하는 패턴
- 게임루프 (업데이트) : 게임의 오브젝트에 라이프사이클을 설정하고 이를 통해 게임오브젝트가 실행해야 할 행동들을 체계적으로 관리
(1) 전략 패턴
전략 패턴(Strategy Pattern)은 한 클래스가 다양한 역할을 할 수 있고 이에 대한 전략을 만들어둔다.
전략 패턴은 마치 하나의 로봇에 다양한 소프트웨어를 설치하여 그 로봇의 역할을 변화시키는 것과 같다.
예를 들어, 로봇에 청소 소프트웨어를 설치하면 청소 로봇이 되고, 경비 소프트웨어를 설치하면 경비 로봇으로, 요리 소프트웨어를 설치하면 요리 로봇으로 동작하는 것처럼, 전략 패턴은 런타임에서 객체의 행동을 유연하게 변경할 수 있게 해준다.
로봇은 기본적인 하드웨어만 가지고 있고, 어떤 소프트웨어를 사용하느냐에 따라 그 역할과 행동이 전혀 달라진다.
즉, 객체지향 그 자체 패턴이다. 공통적인 내용들을 추상화하고, 이를 통해 동적으로 프로그램의 실행흐름을 변경시키는 패턴이다.
필드를 통해 구현하는 경우▼
public class Character : MonoBehaviour
{
    public string actionType;

    void Update()
    {
        if (actionType == "Jump")
        {
            Jump();
        }
        else if (actionType == "Run")
        {
            Run();
        }
        else if (actionType == "Shoot")
        {
            Shoot();
        }
    }

    void Jump()
    {
        Debug.Log("Jumping");
    }

    void Run()
    {
        Debug.Log("Running");
    }

    void Shoot()
    {
        Debug.Log("Shooting");
    }
}
전략 패턴을 통해 구현하는 경우 ▼
public interface ICharacterAction
{
    void Execute();
}

public class JumpAction : ICharacterAction
{
    public void Execute()
    {
        Debug.Log("Jumping");
    }
}

public class RunAction : ICharacterAction
{
    public void Execute()
    {
        Debug.Log("Running");
    }
}

public class ShootAction : ICharacterAction
{
    public void Execute()
    {
        Debug.Log("Shooting");
    }
}

public class Character : MonoBehaviour
{
    private ICharacterAction characterAction;

    public void SetAction(ICharacterAction newAction)
    {
        characterAction = newAction;
    }

    void Update()
    {
        characterAction?.Execute();
    }
}
(2) 명령/메멘토 패턴
메멘토 패턴은 과거로 돌아갈 수 있도록 구현하는 것을 말한다.
방법 : 명령 패턴으로 구현한 다음에 명령들을 스택에 넣고 역으로 읽으면 끝!
기존 코드▼
using UnityEngine;
using UnityEngine.Collections.Generic;

public class PlayerController : MonoBehaviour
{
    private Transform _playerTransform;
		private Vector2 LastMove;
    void Start()
    {
        _playerTransform = this.transform;
    }

    void Update()
    {
        if (Input.GetKeyDown(KeyCode.W))
        {
            Move(Vector2.up);
        }
        if (Input.GetKeyDown(KeyCode.S))
        {
            Move(Vector2.down);
        }
        if (Input.GetKeyDown(KeyCode.Z))
        {
		        MoveBackward();
        }
    }

    void Move(Vector2 vec){
	    _playerTransform.Translate(vec);
	    LastMove = vec;
    }

    void MoveBackward(){
	    _playerTransform.Translate(-LastMove);
	    LastMove = Vector2.zero;
    }
}
명령 패턴을 활용한 코드▼
public interface ICommand
{
    void Execute();
    void Undo();
}

public class MoveCommand : ICommand
{
    private Transform _player;
    private Vector3 _direction;
    private Vector3 _previousPosition;

    public MoveCommand(Transform player, Vector3 direction)
    {
        _player = player;
        _direction = direction;
    }

    public void Execute()
    {
        _previousPosition = _player.position;
        _player.position += _direction;
    }

    public void Undo()
    {
        _player.position = _previousPosition;
    }
}

public class CommandInvoker
{
    private Stack<ICommand> _commandHistory = new Stack<ICommand>();

    public void ExecuteCommand(ICommand command)
    {
        command.Execute();
        _commandHistory.Push(command);
    }

    public void UndoCommand()
    {
        if (_commandHistory.Count > 0)
        {
            ICommand command = _commandHistory.Pop();
            command.Undo();
        }
    }
}

public class PlayerController : MonoBehaviour
{
    private CommandInvoker _invoker;
    private Transform _playerTransform;

    void Start()
    {
        _invoker = new CommandInvoker();
        _playerTransform = this.transform;
    }

    void Update()
    {
        if (Input.GetKeyDown(KeyCode.W))
        {
            ICommand moveUp = new MoveCommand(_playerTransform, Vector3.up);
            _invoker.ExecuteCommand(moveUp);
        }
        if (Input.GetKeyDown(KeyCode.S))
        {
            ICommand moveDown = new MoveCommand(_playerTransform, Vector3.down);
            _invoker.ExecuteCommand(moveDown);
        }
        if (Input.GetKeyDown(KeyCode.Z))
        {
            _invoker.UndoCommand();
        }
    }
}
(3) Pub-Sub(옵저버/이벤트 버스) 패턴
이벤트 기반 프로그래밍은 시스템 내의 다양한 구성 요소들이 느슨하게 결합되어 상호작용할 수 있도록 도와주는 중요한 패턴이다.
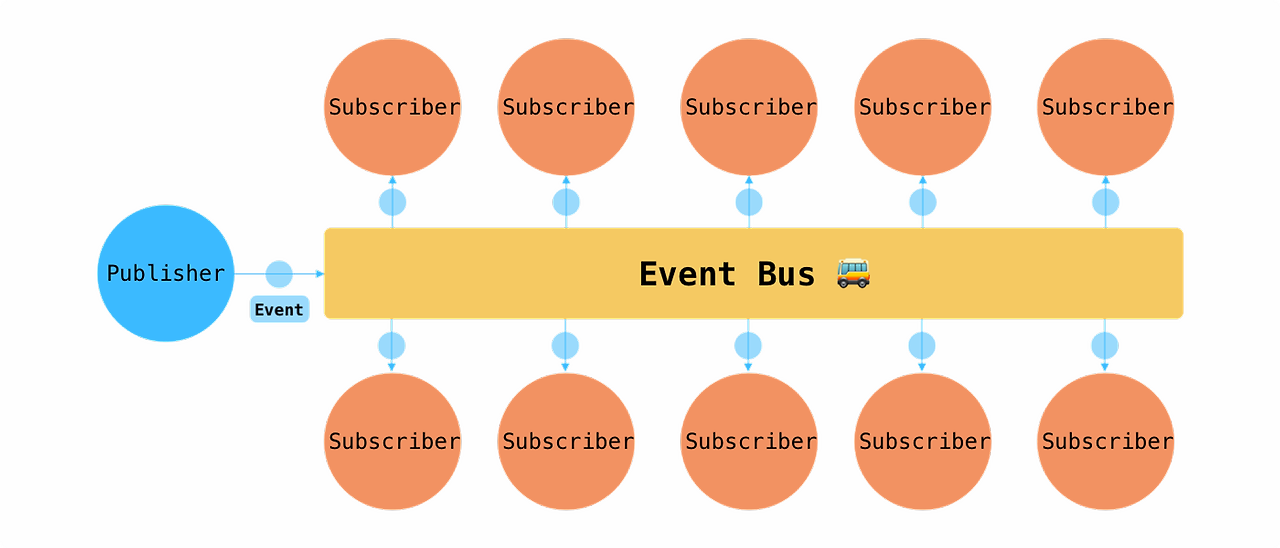
Pub/Sub(Publish/Subscribe) 패턴은 이러한 이벤트 기반 프로그래밍의 핵심 기법으로, 이벤트를 발행하는 Publisher와 이를 구독하는 Subscriber 사이의 의존성을 제거한다.
이를 통해 코드의 모듈화와 유지보수성이 크게 향상되며, 시스템의 확장성 또한 높아진다.
Pub/Sub 패턴은 크게 옵저버 패턴, 이벤트 버스 패턴이 있으며, 발행자와 구독자의 관계에 따라 아래와 같이 정리할 수 있다.
| 발행자 | 구독자 | 대응 방식 |
| 1 | 1 | 함수 호출 |
| 1 | can be N | 옵저버 패턴 |
| can be N | can be N | 이벤트 버스 패턴 |

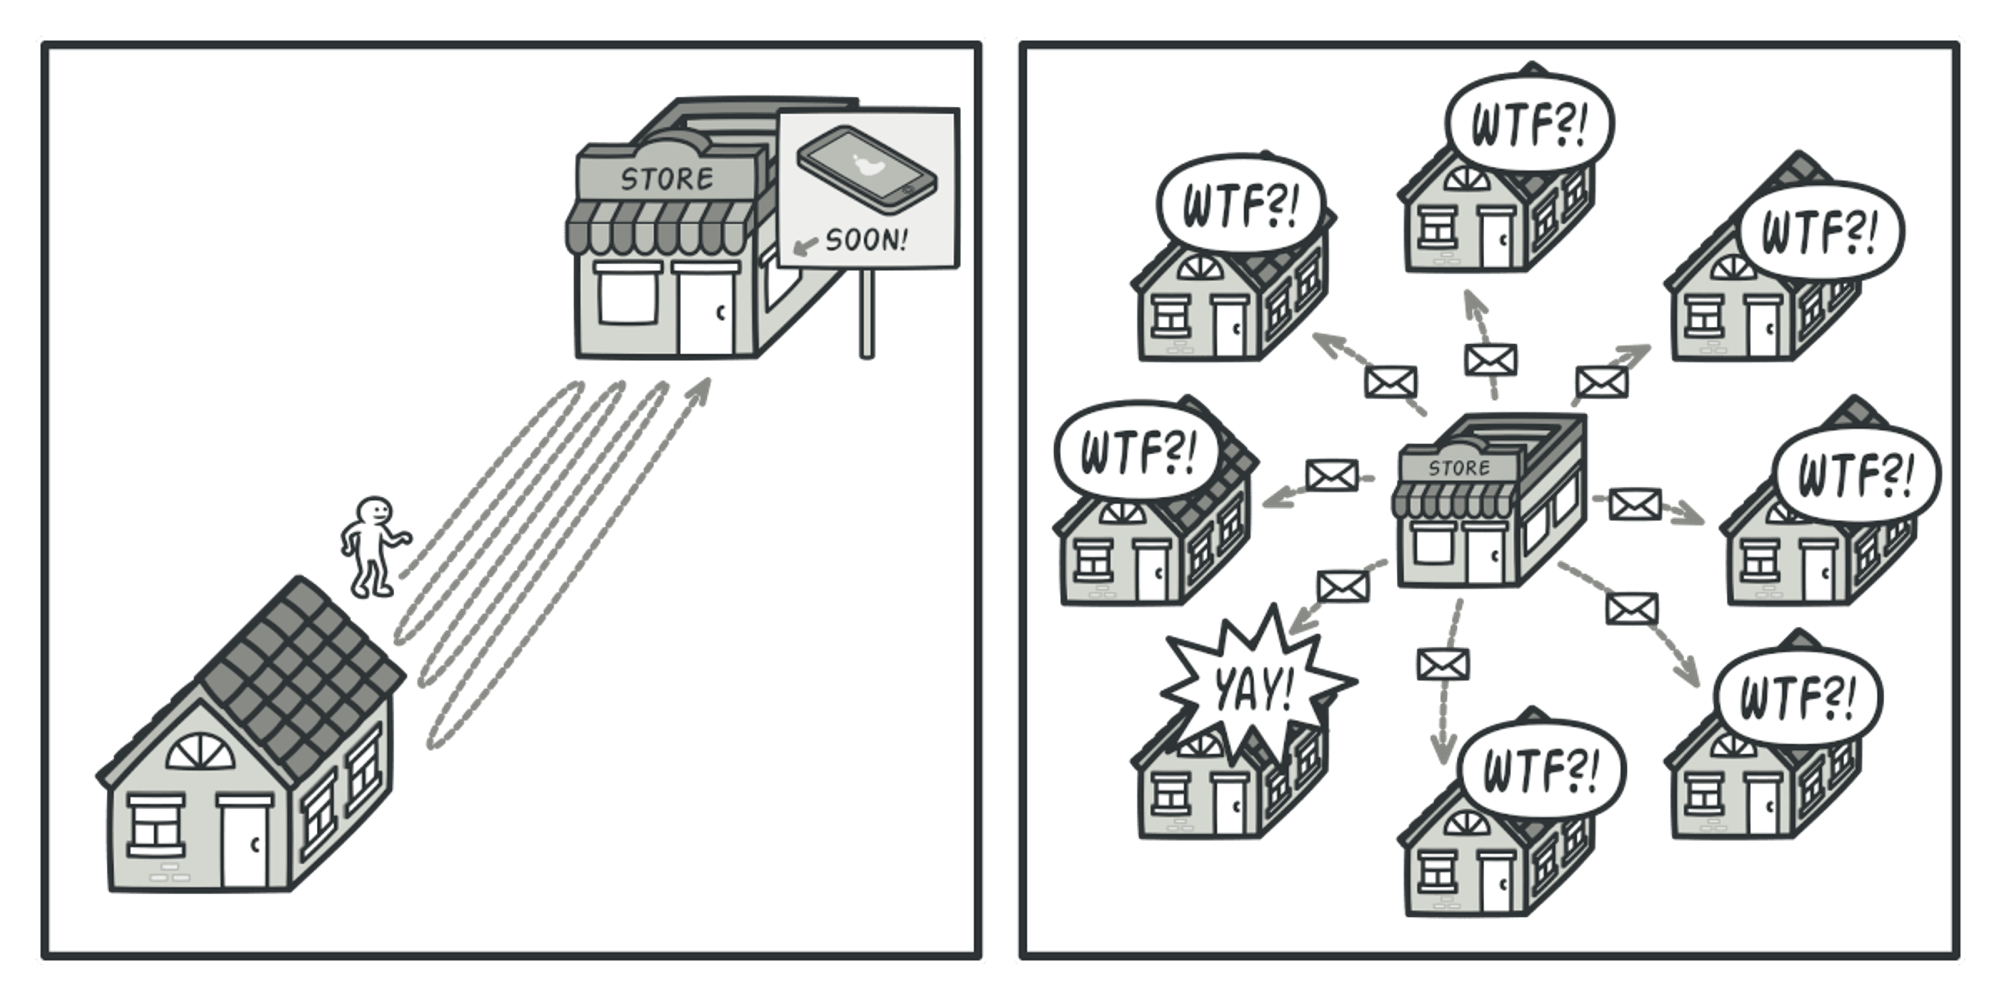
궁금하지도 않은 정보를 전체를 대상으로 뿌리는 스팸형 설계, 매 프레임마다 바뀌었는지 확인하는 설레발형 설계를 개선하기 위한 설계를 생각해봐야한다.
이에 대한 대안으로 이벤트 기반 설계가 제안되었다.
옵저버 패턴
옵저버 패턴의 예시 : `Input System`에서 버튼을 누르면 특정한 함수가 실행되도록 구현한다든지, 어떤 값이 변경될 경우에 특정한 이벤트가 발생한다든지 하는 식
옵저버 패턴은 이벤트를 특정한 오브젝트가 발생시킬 경우 이를 구독하는 구독자들의 함수를 실행시키게 하는 패턴을 말한다. 이때, 발행자와 구독자의 관계에 따라, 아래와 같이 나타낼 수 있다.
옵저버 패턴은 발행자가 1명일때, 구독자가 N명인 방식으로, HP바가 감소했을 때 HP바에 대한 UI처리, 승리/패배 처리 등을 같이 해야 할 때 이런 방식을 생각해볼 수 있다.
예시 - event 활용 ▼
public class PlayerCharacter : MonoBehaviour
	{
	    public event Action<Enemy> OnAttack; // 이벤트 선언

	    public void Attack(Enemy enemy)
	    {
	        // 공격 동작 수행
	        // ...

	        // 이벤트 호출
	        OnAttack?.Invoke(enemy);
	    }
	}

	public class Enemy : MonoBehaviour
	{
	    private void Start()
	    {
	        PlayerCharacter player = FindObjectOfType<PlayerCharacter>();
	        player.OnAttack += ReactToAttack; // 옵저버 등록
	    }

	    private void ReactToAttack(Enemy enemy)
	    {
	        // 공격에 대한 반응 구현
	        // ...
	    }
	}

public class PlayerHealth : MonoBehaviour
{
    public Text healthText;

    private int health = 100;

    private void Start()
    {
        UpdateUI();
    }

    public void TakeDamage(int damage)
    {
        health -= damage;
        UpdateUI();
    }

    private void UpdateUI()
    {
        healthText.text = "Health: " + health.ToString();
    }
}

public class Explosion : MonoBehaviour
{
    public delegate void ExplosionEventHandler();
    public static event ExplosionEventHandler OnExplode; // 이벤트 선언

    private void Start()
    {
        Explode();
    }

    private void Explode()
    {
        // 폭발 동작 수행
        // ...

        // 이벤트 호출
        OnExplode?.Invoke();
    }
}

public class PlayerController : MonoBehaviour
{
    private void Start()
    {
        // 이벤트 핸들러 등록
        Explosion.OnExplode += PlayExplosionSound;
    }

    private void PlayExplosionSound()
    {
        // 폭발 사운드 재생
        // ...
    }
}
이벤트 버스 패턴

이벤트 버스 패턴은 옵저버 패턴이 발행자와 구독자의 명확한 구도가 있었던 것과 다르게, 발행자와 구독자가 모두 최대 N명인 형태를 말한다.
이벤트가 발생했다면 모든 참여자들은 메시지를 받게 되고, 누가 보낸 메시지인지는 알 필요는 없다. 다만, 구현을 다르게 하여 구독자들을 정할 수 있다.
using System;
using System.Collections.Generic;

public static class EventBus
{
    private static Dictionary<string, Action> eventDictionary = new Dictionary<string, Action>();

    public static void Subscribe(string eventName, Action listener)
    {
        if (eventDictionary.TryGetValue(eventName, out Action thisEvent))
        {
            thisEvent += listener;
            eventDictionary[eventName] = thisEvent;
        }
        else
        {
            thisEvent = listener;
            eventDictionary.Add(eventName, thisEvent);
        }
    }

    public static void Unsubscribe(string eventName, Action listener)
    {
        if (eventDictionary.TryGetValue(eventName, out Action thisEvent))
        {
            thisEvent -= listener;
            if (thisEvent == null)
            {
                eventDictionary.Remove(eventName);
            }
            else
            {
                eventDictionary[eventName] = thisEvent;
            }
        }
    }

    public static void Publish(string eventName)
    {
        if (eventDictionary.TryGetValue(eventName, out Action thisEvent))
        {
            thisEvent?.Invoke();
        }
    }
}

using UnityEngine;

public class Listener : MonoBehaviour
{
    private void OnEnable()
    {
        EventBus.Subscribe("TestEvent", OnTestEvent);
    }

    private void OnDisable()
    {
        EventBus.Unsubscribe("TestEvent", OnTestEvent);
    }

    private void OnTestEvent()
    {
        Debug.Log("TestEvent received!");
    }
}

using UnityEngine;

public class Publisher : MonoBehaviour
{
    void Update()
    {
        if (Input.GetKeyDown(KeyCode.Space))
        {
            EventBus.Publish("TestEvent");
        }
    }
}
이벤트 버스 패턴 주의점 - Who Asked?
- 구독했지만 사실 궁금하지 않게 되어버릴 수 있다.
- 모두에게 메시지를 뿌리면서 사실 그 메시지들이 거의 다 버려지는 문제가 발생할 수 있다.
(4) 비트플래그 패턴
비트플래그 패턴(Bit Flag)은 여러 가지 상태나 옵션을 하나의 변수로 관리할 수 있도록 해주는 프로그래밍 기법이다.
주로 비트 연산자를 사용하여 각각의 상태를 비트로 표현하고, 이러한 비트들을 조합하여 하나의 정수형 변수로 관리한다.
이 패턴은 메모리 사용을 최적화하고, 비트 연산자를 통해 상태를 효과적으로 검사하고 조작할 수 있게 해준다.
비트 연산자
비트 연산자는 정수형 변수의 개별 비트를 조작하는 데 사용되는 연산자이다.
비트 연산자는 비트플래그 패턴에서 필수적인 요소로, 여러 상태를 하나의 변수로 관리하고 조작할 수 있게 해준다.
주요 비트 연산자로는 AND, OR, NOT, 비트 쉬프트 연산자가 있다. ▼
2024.03.25 - [C#/연산자] - [C#] 비트 연산
비트플래그 패턴의 장점
- 메모리 효율성: 하나의 변수에 여러 상태를 저장할 수 있어 메모리 사용이 줄어든다.
- 비교 및 조작의 간편함: 비트 연산을 통해 빠르게 상태를 확인하거나 변경할 수 있다.
- 가독성: 적절하게 사용하면 코드가 더 명확하고 이해하기 쉬워진다.
LayerMask 사례
예시 1 : 유니티 LayerMask▼

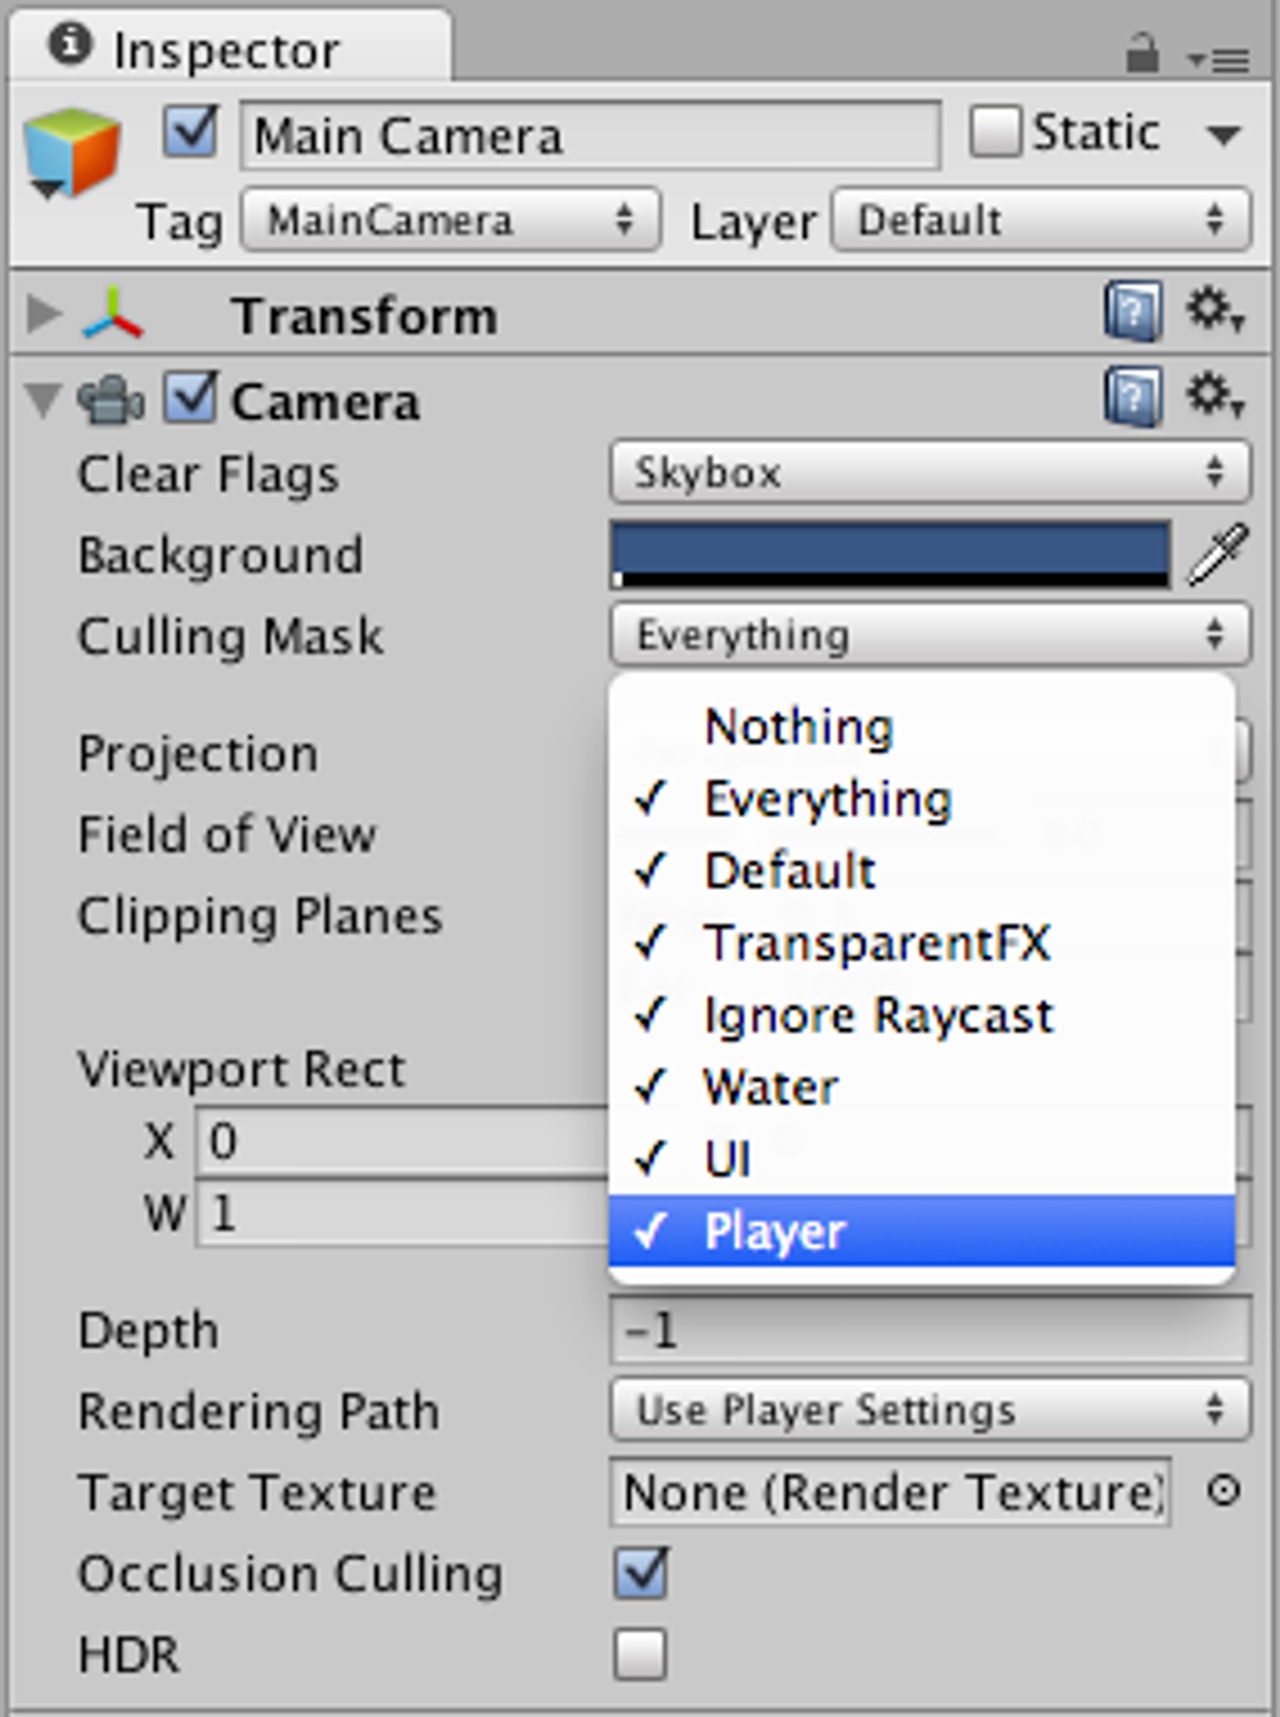
유니티에서 레이어(Layer)를 관리할 때 비트플래그 패턴을 사용하는 주요 사례 중 하나는 `LayerMask`를 사용하여 특정 레이어에 속하는 객체들만을 대상으로 레이캐스트(Raycast)를 수행하는 것이다.
using UnityEngine;

public class LayerMaskExample : MonoBehaviour
{
    public LayerMask layerMask; // 검사할 레이어 마스크

    void Start()
    {
        // 이름으로 레이어를 가져와서 레이어 마스크에 추가
        int layerNumber = LayerMask.NameToLayer("MyLayer");
        layerMask = 1 << layerNumber;

        // 기존 레이어 마스크에 새로운 레이어를 추가
        layerMask |= (1 << LayerMask.NameToLayer("AnotherLayer"));
    }

    void Update()
    {
        // 카메라가 바라보는 방향으로 레이캐스트를 수행
        Ray ray = Camera.main.ScreenPointToRay(Input.mousePosition);
        RaycastHit hit;

        // 지정한 레이어 마스크를 사용하여 레이캐스트를 수행
        if (Physics.Raycast(ray, out hit, Mathf.Infinity, layerMask))
        {
            // 레이캐스트가 특정 레이어의 객체에 충돌한 경우
            Debug.Log("레이캐스트가 " + hit.collider.name + " 에 충돌했습니다.");
        }

        // 특정 레이어 번호를 검사
        if (hit.collider != null)
        {
            if (hit.collider.gameObject.layer == LayerMask.NameToLayer("MyLayer"))
            {
                Debug.Log("충돌한 객체는 MyLayer에 속합니다.");
            }
            else if (hit.collider.gameObject.layer == LayerMask.NameToLayer("AnotherLayer"))
            {
                Debug.Log("충돌한 객체는 AnotherLayer에 속합니다.");
            }
        }
    }
}
예시 2 : Enum Flags▼

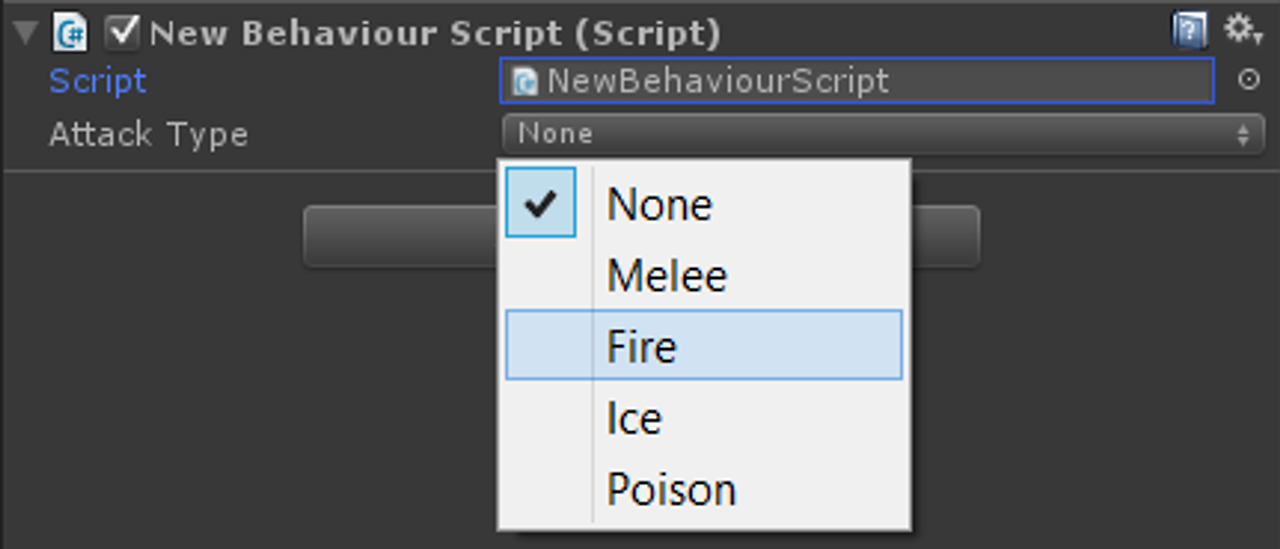
`Flags`라는 애트리뷰트를 통해 `enum`이 비트플래그처럼 작동하게 할 수 있다.
이렇게 하면, 다양한 상태를 중첩해서 가질 수 있는 열거형이 된다.
public enum ItemType{
	Armor = 1,
	Potion = 2,
	Accessory = 3,
	Belt = 4,
	...
}

[Flags]
public enum CharacterState
{
    None = 0,
    Idle = 1 << 0,
    Running = 1 << 1,
    Jumping = 1 << 2,
    Attacking = 1 << 3,
    Defending = 1 << 4

}
[Flags]
public enum EquipStatus{
		Nothing = 0,
		LeftHand = 1 << 0,
		RightHand = 1 << 1,
		Both = LeftHand | RightHand
}

public class Character : MonoBehaviour
{
    public CharacterState currentState;

    void Start()
    {
        // 상태 설정
        currentState = CharacterState.Idle | CharacterState.Defending;

        // 상태가 Idle인지 확인
        if ((currentState & CharacterState.Idle) == CharacterState.Idle)
        {
            Debug.Log("캐릭터가 Idle 상태입니다.");
        }

        // 상태가 Defending인지 확인
        if ((currentState & CharacterState.Defending) == CharacterState.Defending)
        {
            Debug.Log("캐릭터가 Defending 상태입니다.");
        }
    }

    void Update()
    {
        // 상태 변경 예시
        if (Input.GetKeyDown(KeyCode.Space))
        {
            currentState |= CharacterState.Jumping;
            Debug.Log("캐릭터가 Jumping 상태로 변경되었습니다.");
        }

        if (Input.GetKeyDown(KeyCode.A))
        {
            currentState &= ~CharacterState.Defending;
            Debug.Log("캐릭터가 Defending 상태를 해제했습니다.");
        }
    }
}'스파르타 게임개발종합반(Unity) > TIL - 본캠프 매일 공부 기록' 카테고리의 다른 글
| 2024.05.31 TIL - Framework 특강 정리 (0) | 2024.05.31 |
|---|---|
| 2024.05.30 TIL - 객체지향 특강2 정리(SOLID 원칙) (0) | 2024.05.30 |
| 2024.05.28 TIL - 디버깅 특강 정리 (0) | 2024.05.28 |
| 2024.05.27 TIL - InputSytem, InvokeEvent, Phase, 데미지 Flash효과 - Coroutine, 낮과 밤 표현 - Directional Light, Gradient, AnimationCurve, AutoCollider(콜라이더 크기), Static 옵션 (0) | 2024.05.27 |
| 2024.05.24 TIL - Ray, Raycast, IsGrounded, 땅 충돌 체크 (0) | 2024.05.24 |


댓글